A Lexington homeowner was experiencing water intrusion in their basement. The home’s stone foundation, while beautiful and historic, allowed water to seep through gaps between the stones, leaving damp spots on the floor and creating musty odors. To fully protect the space, a comprehensive waterproofing solution was needed.
Solution
Our team installed a multi-layered system to keep the basement dry:
WaterGuard interior perimeter drainage system to capture water along the floor-wall joint.
Trench drain at the base of the stairwell to capture water runoff down the walkout staircase.
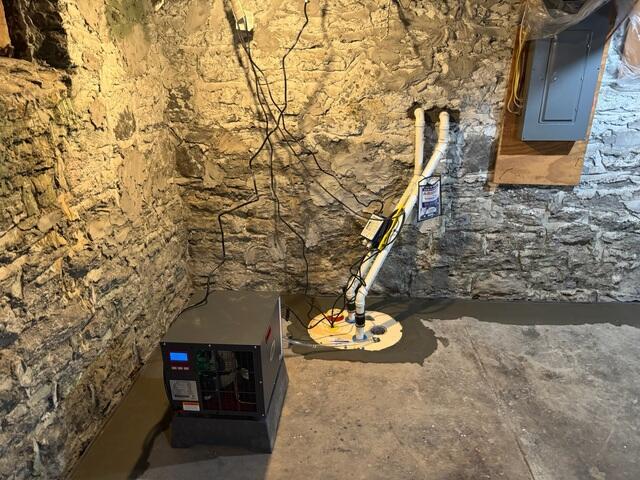
TripleSafe sump pump to move collected water safely away from the home, providing three levels of protection.
SaniDry Sedona dehumidifier to control humidity and improve air quality.
This system manages both incoming water and ambient moisture, protecting the basement from present and future issues.
Results The basement is now fully protected. Water no longer seeps through the stone foundation, and the dehumidifier keeps humidity levels under control, improving air quality and comfort. The homeowners can enjoy their historic home with confidence, knowing their basement is safe from water damage.
Insight Stone foundations have unique water entry points, but combining interior drainage, trench drains, reliable sump pumping, and dehumidification creates a complete, long-term solution for both current leaks and future moisture concerns. Be sure to scroll through the photos to see how we waterproofed this basement step-by-step.
Old sump pump discovered during the initial inspection, showing signs of wear and limited capacity to handle heavy water flow. This homeowner was tired of their current exterior drainage system as well.
Moisture marks along the wall cove observed during the initial inspection, confirming where water was entering through the stone foundation. We moved this water heater away from the wall before installing as well.
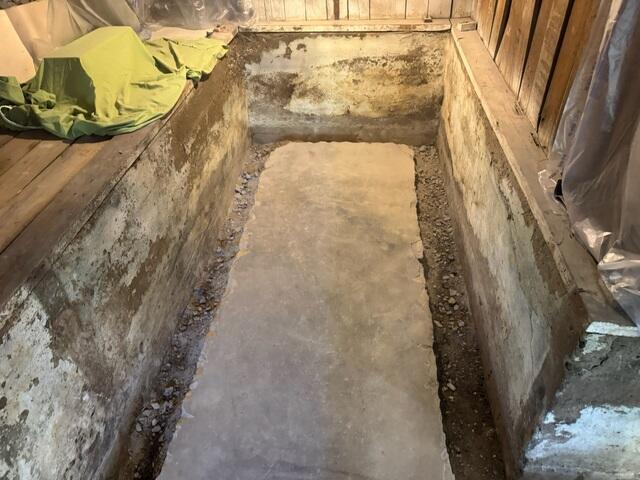
This photo shows an open trench with weep holes drilled into the coves. This trench was dug on top of the footing of the home. Our WaterGuard is always installed on the top of the footing to ensure it stays out of the "mud-zone" found below and next-to the footing. Before jackhammering the floor, we made sure to protect the space from dust with plastic. This included covering the vents and all the homeowners items.
TripleSafe sump basin set into place before connection, ready to handle incoming water from the new drainage system. This sump basin is the largest we offer.
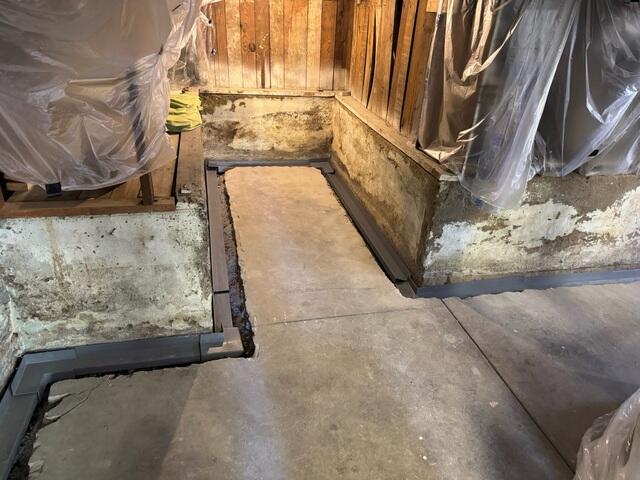
WaterGuard positioned into the trench before we pitched/fitted it all together. Note the wall flange that captures wall leaks directly into the system.
WaterGuard channel backfilled with gravel and sealed with moisture-transfer prevention tape for long-term performance.
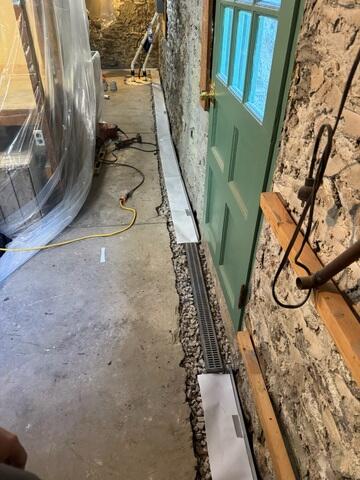
Trench drain tied into the WaterGuard system after backfilling with clean gravel and sealing with moisture-proof tape to block moisture transfer.
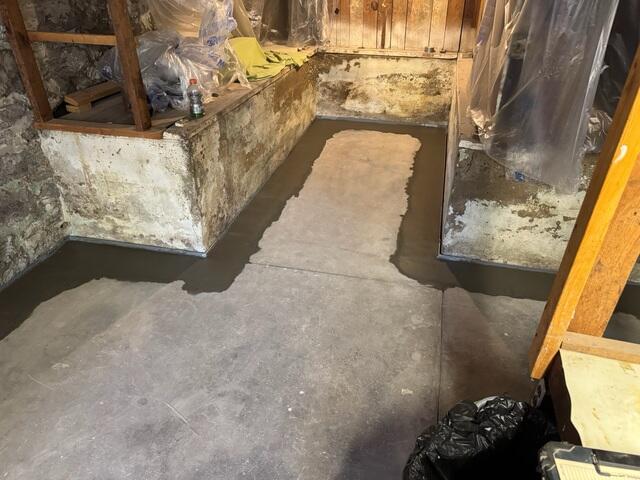
Concrete restored over the trench drain and WaterGuard from the same angle, blending seamlessly with the existing basement floor.
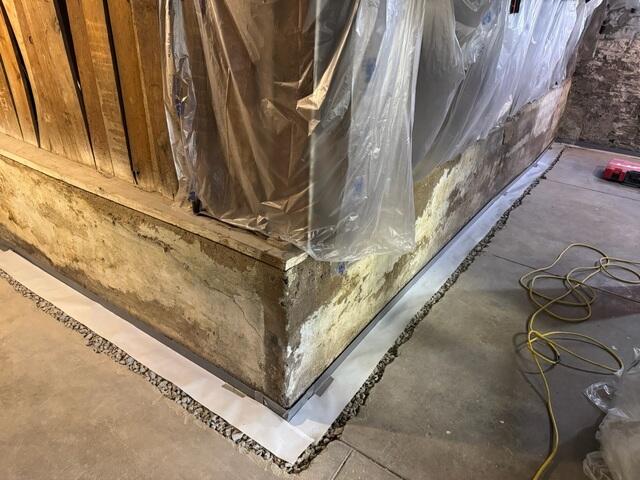
WaterGuard perimeter drain completed along the foundation wall, concealed beneath fresh concrete. A little bit of the wall flange is left exposed above the floor to be able to transfer wall leaks into the system.
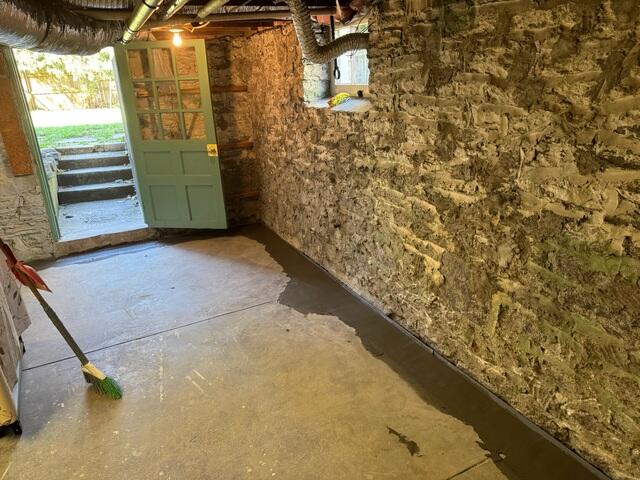
Another view of the completed WaterGuard system showing a clean and professional finish.
Final section of WaterGuard completed, sealing the system edge-to-edge along the basement perimeter.
SaniDry Sedona dehumidifier and TripleSafe sump system installed to control humidity and discharge water safely. The TripleSafe comes with three pumps inside its liner, including one that is backed by a battery backup system in case of power failure. The SaniDry Sedona can remove up to 99 pints of water out of the air in a day, and helps filter dust mites, spores, and other fine particles. The TripleSafe lid is airtight and comes with an airtight floor drain and an alarm system.
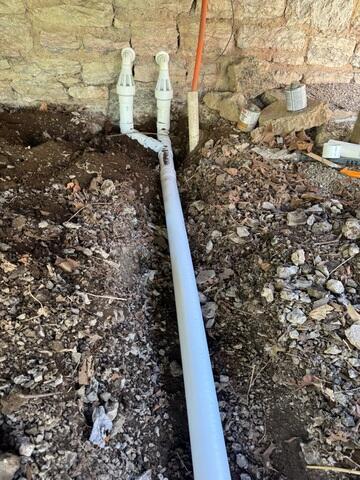
IceGuard outlets installed beneath the deck to protect the discharge line from freezing and backups.
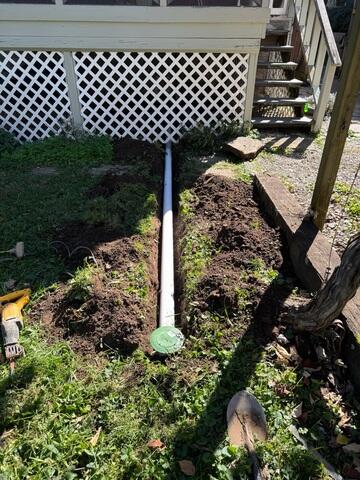
Discharge line exposed during installation, showing the pop-up outlet before final backfilling.
Discharge line fully backfilled and concealed, leaving only the clean green pop-up outlet visible.